

Last Updated on: 17th May 2026, 03:07 pm
You’ve decided to launch a WordPress site. You have a name in mind, maybe a rough idea of what you want it to look like, and a lot of enthusiasm. But then you hit a wall: where does the site actually live? How do you get it online safely? Many beginners are unsure of the web hosting steps needed to launch a WordPress site, and that confusion can stall even the most motivated person before they ever publish a single page. This step by step wordpress hosting setup guide walks you through every stage, from gathering the right tools to verifying your site before launch, so you can move forward with confidence and clarity.
Table of Contents
- What you need before you start: Hosting and tools checklist
- How to choose the right WordPress hosting provider
- Step-by-step: Setting up your WordPress hosting account
- Troubleshooting and avoiding common setup mistakes
- Verifying your WordPress hosting: What to check before launch
- Why getting hosting right makes or breaks your WordPress site
- Ready to set up your WordPress hosting? Get expert help
- Frequently asked questions
Key Takeaways
| Point | Details |
|---|---|
| Preparation is key | Gather your domain, credentials, and tools before starting your WordPress hosting setup. |
| Choose wisely | Picking the right hosting provider greatly affects your site’s performance, security, and scalability. |
| Follow the steps | Set up your hosting methodically for the best reliability and minimal errors. |
| Verify everything | Always test your site’s speed, security, and backups before making it public. |
| Learn from mistakes | Troubleshoot and address common setup errors to avoid future issues. |
What you need before you start: Hosting and tools checklist
Before you jump into setting things up, it’s important to be prepared with the necessary essentials. Think of this stage like packing before a road trip. If you forget something critical, you’ll have to turn around and lose time. Getting organized now saves you from frustrating detours later.
Your domain name
Your domain name is your website’s address on the internet—something like yoursite.com. Without one, visitors have no way to find you. You can register a domain through your hosting provider or through a separate domain registrar like Namecheap or Google Domains. Either approach works, but keeping your domain and hosting in the same account simplifies management, especially when you’re just starting out.
Reliable hosting is the critical foundation for your WordPress site’s speed, security, and uptime, and your domain name is the front door to that foundation. Register it early, before you even set up hosting, because popular names go fast.
Choosing the right hosting type
Not all hosting is created equal, and picking the wrong type can cause headaches down the road. Here’s a quick breakdown:
| Hosting type | Best for | Average monthly cost | WordPress support |
|---|---|---|---|
| Shared hosting | Beginners, blogs, small sites | $3 to $10 | Basic, often one-click install |
| Managed WordPress | Beginners who want hands-off setup | $15 to $50 | Excellent, WordPress-optimized |
| VPS hosting | Growing sites needing more control | $20 to $80 | Moderate, requires some tech knowledge |
| Dedicated server | Large sites with heavy traffic | $80 to $300+ | Full control, high technical skill needed |
For most beginners, shared hosting or managed WordPress hosting is the right call. Shared hosting means your site shares server resources with other websites, which keeps costs low. Managed WordPress hosting, on the other hand, is specifically configured for WordPress and usually includes automatic updates, better security, and expert support. It costs a bit more, but for peace of mind, it’s often worth it.
For a deeper look at understanding web hosting basics, it helps to know what’s happening behind the scenes before you commit to a plan.
Essential tools and credentials to have ready
Before you create your hosting account, gather the following:
- Payment information for your hosting plan
- Your chosen domain name (or access to your domain registrar account)
- An email address you check regularly, used for account alerts and recovery
- An FTP client such as FileZilla, which lets you transfer files to your server if needed
- A basic understanding of SSL certificates, which encrypt data between your site and visitors (most hosts include a free one via Let’s Encrypt)
- A backup tool or plugin, such as UpdraftPlus, to protect your data from day one
Pro Tip: Register your domain name at least a few days before you plan to launch. DNS propagation, the process of your domain pointing to your new server, can take up to 48 hours. Starting early means no last-minute delays.
How to choose the right WordPress hosting provider
With your checklist ready, the next step is selecting the right provider to host your site. This decision matters more than most beginners realize. Your hosting provider affects how fast your pages load, how secure your data is, and how much help you get when something goes wrong.
What to look for in a provider
Different hosting providers offer varying features that can significantly impact performance and management simplicity for WordPress sites. Here’s what you should prioritize when evaluating your options:
- Uptime guarantee: Look for providers that promise 99.9% uptime or higher. Uptime refers to how often your server is running and your site is accessible. Even a small drop below 99.9% can mean hours of downtime per month.
- WordPress-specific features: One-click WordPress installation, automatic core updates, and staging environments (a private copy of your site for testing changes) are all signs of a WordPress-friendly host.
- Customer support: 24/7 live chat or phone support is essential for beginners. You don’t want to be stuck at midnight with a broken site and no one to call.
- Scalability: As your site grows, your hosting needs will too. Choose a provider that lets you upgrade your plan without migrating to a completely new service.
- Transparent pricing: Some hosts advertise low introductory rates but charge significantly more on renewal. Always check the renewal price before signing up.
- Security features: Look for hosts that include free SSL certificates, malware scanning, and firewall protection as standard features, not expensive add-ons.
Managed WordPress vs. shared hosting: a practical comparison
| Feature | Shared hosting | Managed WordPress hosting |
|---|---|---|
| Setup difficulty | Low | Very low |
| WordPress optimization | Basic | High |
| Automatic updates | Rarely included | Usually included |
| Security | Basic | Enhanced |
| Support quality | General | WordPress-specific |
| Cost | Lower | Moderate to higher |
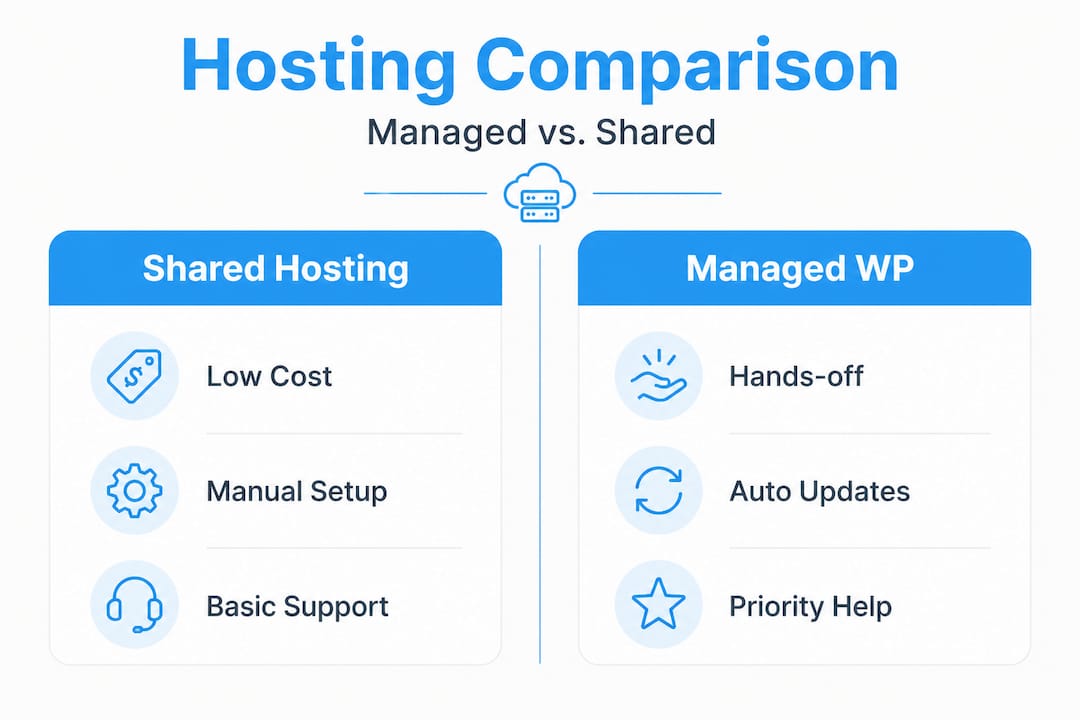
Managed WordPress hosting removes a lot of the technical burden. Your host handles server-level security, caching (storing site data so pages load faster), and updates. Shared hosting gives you more control but requires you to manage more yourself.
Red flags to avoid
Don’t be fooled by flashy marketing. Watch out for these warning signs:
- No mention of uptime guarantees in the service agreement
- No refund policy or a very short money-back window
- Slow or unhelpful support during your pre-purchase questions
- Hidden fees for SSL certificates, backups, or domain privacy
- Overcrowded servers with no clear limits on how many sites share your resources
Pro Tip: Before committing to a provider, test their support by sending a pre-sales question. How fast they respond and how clearly they answer tells you a lot about what you’ll experience as a paying customer. Also, check out comparing WordPress hosting options to see side-by-side breakdowns of the top providers.
Step-by-step: Setting up your WordPress hosting account
Once you’ve chosen a provider, it’s time to create your account and initialize your hosting environment. This is where things get real. The good news is that most modern hosting providers have simplified this process significantly.
Setting up a hosting account is typically a straightforward process, but there are important steps to follow to ensure security and functionality. Here’s how to do it correctly:
Choose your hosting plan and complete payment. Select the plan that fits your current needs, keeping scalability in mind. Most beginner-friendly hosts offer a monthly or annual billing cycle. Annual plans usually come with a discount.
Register or connect your domain. If you’re buying a domain through your host, this happens during checkout. If you already own a domain through a separate registrar, you’ll need to update your DNS records to point to your new host’s name servers. Your host will provide these name server addresses in your welcome email.
Log in to your hosting control panel. Most hosts use cPanel or a proprietary dashboard. This is your command center. From here, you manage files, databases, email accounts, and more.
Install WordPress. Look for a one-click installer, often labeled “WordPress” or “Softaculous” in your control panel. Click it, fill in your site name, admin username, and password, and the installer handles the rest. This takes about two to five minutes.
Activate your SSL certificate. Navigate to the SSL section of your control panel and activate the free Let’s Encrypt certificate. This adds “https” to your URL and shows visitors that your site is secure. Some hosts activate this automatically.
Set a strong admin password. Use a combination of letters, numbers, and symbols. Avoid using “admin” as your username, which is one of the first things hackers try.
Set up automatic backups. Check whether your host includes daily backups. If not, install a plugin like UpdraftPlus and configure it to back up your site to an external location like Google Drive or Dropbox.
Update WordPress, themes, and plugins. Right after installation, log in to your WordPress dashboard and run all available updates. Starting with an up-to-date installation reduces your security risk immediately.
Statistic callout: Most users can complete a step-by-step web hosting setup in under one hour when they have their domain, payment information, and login credentials ready in advance.
Pro Tip: Double-check your DNS and SSL setup within 24 to 48 hours of registering your domain. If your site shows a “not secure” warning or doesn’t load correctly, your DNS may not have fully propagated yet. A quick check through a tool like dnschecker.org shows you whether your domain is pointing to the right server globally.
Troubleshooting and avoiding common setup mistakes
Even with a solid setup, beginners can run into snags. Here’s how to avoid the most common ones and recover quickly when they happen.
Incorrect configurations are a leading cause of downtime and security issues in new WordPress sites. Most of these problems are preventable with a little attention to detail.
The most common beginner mistakes
- Using “admin” as your WordPress username. This is the default username that automated hacking tools target first. Change it during installation or immediately after.
- Skipping updates. Outdated WordPress core files, themes, and plugins are the number one entry point for hackers. Enable automatic updates where possible.
- Not setting up backups before making changes. Many beginners install a theme, break something, and then realize they have no backup to restore from. Always back up before making major changes.
- Ignoring SSL setup. A site without HTTPS loses visitor trust and ranks lower in search results. Activate your SSL certificate on day one.
- Installing too many plugins at once. Each plugin adds code that can slow your site or conflict with other plugins. Install only what you need and test each one individually.
- Choosing a weak password. Short or obvious passwords are cracked in seconds by automated tools. Use a password manager to generate and store a strong one.
- Not testing on mobile. Over half of web traffic comes from mobile devices. Always preview your site on a phone before launching.
Quick fixes for common problems
If your site won’t load after setup, start by checking whether your domain’s DNS is pointing to the correct name servers. If WordPress shows a white screen, a conflicting plugin is usually the cause. Deactivate all plugins through your hosting file manager and reactivate them one by one. If your SSL certificate shows an error, try reissuing it through your control panel or contact your host’s support team.
Critical warning: Never launch your WordPress site without a working backup system in place. Data loss can happen from a server error, a bad plugin update, or a hacking attempt. If you don’t have a backup, you could lose everything you’ve built. Set up automated daily backups to an off-site location before you publish a single page.
For a full overview of avoiding hosting pitfalls, it’s worth reading through common scenarios that trip up new site owners so you can recognize them early.
Verifying your WordPress hosting: What to check before launch
Before you tell the world about your new WordPress site, it’s essential to test and verify your hosting setup. A few minutes of checking now can save you hours of fixing later.
Checking your site’s speed, security features, and backups before launch avoids major issues down the line. Here’s a systematic approach:
Test your page load speed. Use a free tool like Google PageSpeed Insights or GTmetrix. Enter your URL and review the results. Aim for a load time under three seconds. If it’s slower, consider enabling caching through a plugin like W3 Total Cache or WP Super Cache.
Confirm your SSL certificate is active. Open your site in a browser and look for the padlock icon next to your URL. If it’s missing or shows a warning, revisit your SSL settings in the control panel.
Check your backup system is running. Log in to your backup plugin or hosting dashboard and confirm that a recent backup exists and is stored in an external location.
Test all major pages and links. Click through your homepage, about page, contact page, and any other key pages. Make sure no links are broken and all images load correctly.
Verify plugin and theme compatibility. Check that all installed plugins are active and functioning. Look for any error messages in the WordPress dashboard under “Plugins.”
Review your site on mobile. Open your site on a smartphone and tablet. Check that text is readable, buttons are clickable, and images display properly.
Confirm your contact form works. Submit a test message through your contact form and make sure it arrives in your inbox. A broken contact form means missed leads.
| What to check | Why it matters | How to fix it |
|---|---|---|
| Page load speed | Slow sites lose visitors quickly | Enable caching, optimize images |
| SSL certificate | Protects data and builds trust | Reissue certificate in control panel |
| Backup system | Prevents total data loss | Install UpdraftPlus, configure off-site storage |
| Mobile display | Most traffic comes from phones | Use a responsive theme, test on real devices |
| Broken links | Damages user experience and SEO | Use a plugin like Broken Link Checker |
| Contact form | Ensures you receive inquiries | Test manually before launch |
Why getting hosting right makes or breaks your WordPress site
Let’s pull back for a moment and think about why all of this matters beyond just getting your site online.
Most beginner guides focus on the mechanics: click here, fill in that, press install. What they rarely talk about is the compounding effect of a bad hosting decision. A slow server doesn’t just frustrate visitors. It directly affects your search engine rankings, because Google factors page speed into how it ranks your site. A host with poor security doesn’t just risk a hack. It risks your reputation, your data, and the trust of every person who visits your site.
Here’s something that experienced site owners know but rarely say out loud: the cheapest hosting option almost always costs you more in the long run. When your site goes down during a product launch, when a hack wipes your content, or when slow load times tank your traffic, the “savings” from a budget host evaporate fast. The real cost is measured in lost opportunities, not just dollars.
Another thing beginners overlook is the support factor. When something breaks at 10 PM on a Saturday, you need someone who knows WordPress specifically, not a generic support agent reading from a script. Why hosting matters for WordPress goes deeper than most people expect. It’s the difference between a site that grows steadily and one that constantly fights fires.
The insider lesson here is simple: never assume anything is handled. Don’t assume your host is running backups just because they mentioned it in a feature list. Log in and verify. Don’t assume your SSL is active just because you clicked a button. Open your site in a browser and confirm the padlock is there. Experts check. Beginners assume. That gap is where most problems live.
Speed, security, and support are not optional extras. They are the foundation that every other part of your WordPress site is built on. Get them right from the start, and everything else becomes easier.
Ready to set up your WordPress hosting? Get expert help
You now have the know-how. Here’s how to put it into action with trusted help.
At Digi Host Guide, we’ve done the research so you don’t have to start from scratch. Our detailed WordPress hosting setup guide walks you through every technical detail with clear explanations designed for beginners and experienced users alike. If you’re ready to compare your options side by side, our curated list of top web hosting providers breaks down performance, pricing, and support quality so you can make a confident, informed choice. Whether you’re launching your first blog or setting up a business site, we have the resources to help you move forward without second-guessing every decision.
Frequently asked questions
Do I need managed WordPress hosting or is shared hosting enough?
Shared hosting can work for basic sites, but managed hosting offers better support, security, and ease for beginners. Different hosting providers offer varying features that can significantly impact performance and management simplicity for WordPress sites, so your choice should reflect your comfort level and growth plans.
How long does it take to set up WordPress hosting?
Setting up a WordPress hosting account usually takes under an hour if you have your domain and payment info ready. As noted, setting up a hosting account is typically a straightforward process, but following each step carefully ensures security and full functionality.
What happens if I make a mistake during setup?
Most mistakes can be fixed through your hosting provider’s control panel or support team, so double-check as you go. Keep in mind that incorrect configurations are a leading cause of downtime and security issues, which is why reviewing each step before moving to the next one matters.
Do I need to buy a new domain when switching hosts?
No, you can keep your existing domain and simply update the DNS records to point to your new host’s name servers. Reliable hosting is the critical foundation for your WordPress site’s speed, security, and uptime, and switching hosts does not require you to give up the domain name you’ve already built recognition around.
