

Last Updated on: 13th August 2026, 11:32 am
WordPress site optimization is defined as the process of improving speed, SEO, and user experience through targeted, measurable changes to your server setup, front-end assets, and content structure. If you want to optimize WordPress site, a 1-second load time reduction can increase conversion rates by 17%, and a 100ms delay causes a 7% drop in conversions. That’s not a rounding error. It’s the difference between a site that earns and one that leaks revenue. This tutorial follows a diagnostic-first approach: you measure with real-user data from Google PageSpeed Insights and Core Web Vitals, identify the actual bottlenecks, then apply fixes in priority order. No guesswork, no wasted effort.
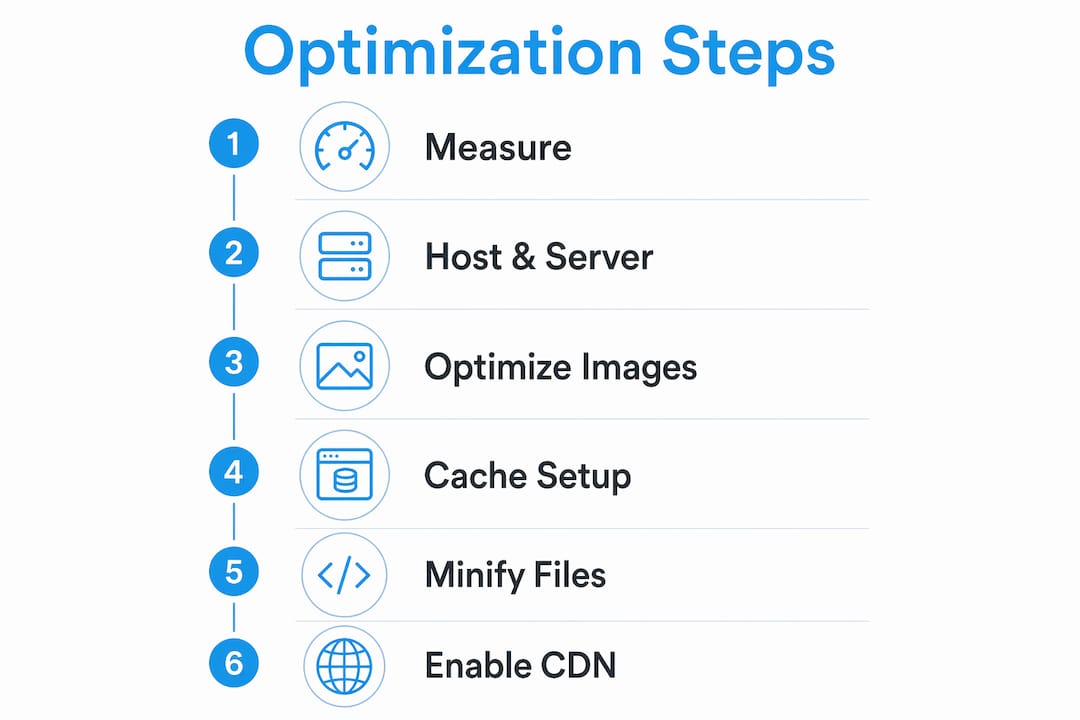
How to measure your WordPress site’s current performance
Before you change a single setting, you need a clear picture of where your site actually stands. Most WordPress users skip this step and go straight to installing plugins. That’s how you end up with 12 caching plugins and a site that’s still slow.
Here’s a structured way to measure your site’s performance before touching anything:
Run Google PageSpeed Insights on your homepage and a key landing page. PageSpeed Insights pulls from the Chrome User Experience Report (CrUX), which reflects real user data, not just a simulated lab test. This distinction matters because lab data can look clean while real users on mobile connections experience something very different.
Check your Time to First Byte (TTFB). TTFB below 200ms is the target. Anything above 600ms signals a server-side problem, usually poor hosting, no server caching, or an overloaded database. TTFB is your first diagnostic filter.
Review your Largest Contentful Paint (LCP). LCP measures how long it takes for the main visible element (usually a hero image or heading) to load. The target is under 2.5 seconds for 75% of users. If you’re above 4 seconds, image optimization and render-blocking resources are likely culprits.
Check Cumulative Layout Shift (CLS). CLS below 0.1 means your page isn’t jumping around as it loads. A score above 0.25 frustrates users and signals poor front-end structure to Google.
Look at Interaction to Next Paint (INP). INP replaced First Input Delay as a Core Web Vital in 2024. It measures responsiveness across all user interactions, not just the first click. Target: under 200ms.
Core Web Vitals thresholds reflect real user experience quality, not cosmetic surface metrics. Treat them as your baseline health check, not a one-time score to chase.
Pro Tip: Set up a free WebPageTest account and run the same URL three times in a row. Average the results. Single-run scores can be misleading due to server warm-up effects and CDN caching behavior.
What are the most impactful WordPress optimization techniques?
Most performance issues trace back to a small number of root causes. Fixing them in order of impact gets you faster results than applying every tactic at once. Here’s how to prioritize.
Start with your hosting and server response
Your hosting plan sets the speed ceiling for everything else. No amount of front-end optimization compensates for a slow server. If your TTFB is above 600ms, upgrade your hosting before touching images or JavaScript. Managed WordPress hosts like WP Engine and Kinsta are built with server-level caching and PHP optimization out of the box. Shared hosting plans on entry-level tiers often can’t deliver consistent TTFB under 300ms under real traffic.
OPcache compiles PHP bytecode into shared memory, reducing PHP execution time by 50 to 70%. Redis object caching cuts database queries by 60 to 80%. These are server-side wins that no plugin can replicate without the underlying infrastructure. If your host doesn’t support OPcache or Redis, that’s a sign to look at your hosting options for performance.
Optimize your images properly
Images are the single largest contributor to page weight on most WordPress sites. WebP images are 25 to 35% smaller than equivalent JPEGs, and AVIF goes further, though browser support is still catching up. Convert your image library using a plugin like ShortPixel or Imagify, and set WebP as the default delivery format.

One mistake that kills LCP scores: applying lazy loading to your hero image. Lazy loading tells the browser to wait before fetching an image. On above-the-fold content, that delay directly pushes your LCP past the 2.5-second threshold. Exclude your hero image from lazy loading explicitly.
Set up caching layers in the right order
Full-page caching reduces PHP execution time dramatically, cutting page response from hundreds of milliseconds down to 10 to 30ms. LiteSpeed Cache works best on LiteSpeed servers. Nginx FastCGI Cache integrates tightly with Nginx-based hosting. WP Rocket is the most widely compatible option for shared and managed environments.
Beyond page caching, add browser caching headers so returning visitors load assets from their local cache rather than your server. Set cache expiry for static assets (CSS, JS, images) to at least one year.
Reduce render-blocking CSS and JavaScript
Render-blocking resources delay the browser from displaying your page. Minify CSS and JavaScript files, defer non-critical scripts, and load only the CSS needed for above-the-fold content (critical CSS). Plugins like WP Rocket and NitroPack handle most of this automatically, but always test after enabling these features. Aggressive JS deferral can break sliders, forms, and checkout flows.
Use a CDN to reduce latency
A Content Delivery Network like Cloudflare serves your static assets from servers geographically close to each visitor. This reduces the physical distance data travels, which directly lowers TTFB and LCP for international audiences. Cloudflare’s free tier covers most small to medium WordPress sites. For higher-traffic sites, Cloudflare Pro or BunnyCDN offer more granular caching controls.
Pro Tip: Use the Query Monitor plugin to identify slow database queries and plugin-generated queries. Focus on queries slower than 50ms. This tells you which plugins are actually hurting performance, rather than guessing based on plugin count alone.
Here’s a quick comparison of the most common caching approaches:
| Caching type | Best for | Speed gain |
|---|---|---|
| Full-page cache (LiteSpeed, Nginx) | Server-level, high-traffic sites | Very high (10–30ms response) |
| WP Rocket page cache | Shared/managed hosting | High |
| Redis object cache | Database-heavy sites, WooCommerce | High (60–80% fewer DB queries) |
| Browser cache headers | Returning visitors | Medium |
| CDN (Cloudflare, BunnyCDN) | Global audiences | Medium to high |
How to improve your WordPress SEO through internal linking
Internal linking is one of the most underused SEO levers in WordPress. It costs nothing, requires no third-party tools, and directly improves how Google crawls and ranks your pages. Here’s a structured approach.
Find your orphan pages first. An orphan page has no internal links pointing to it, so Google may never discover or prioritize it. Cross-reference your XML sitemap URLs against the internal links list in Google Search Console. Any URL in your sitemap but absent from GSC’s internal links report is an orphan. Add 2 to 3 contextual links per orphan page from relevant, high-traffic content.
Build a pillar and cluster structure. A pillar page covers a broad topic in depth. Cluster pages cover subtopics and link back to the pillar. This hub-and-spoke architecture concentrates topical authority on your most important pages and signals to Google that your site covers a subject thoroughly.
Add 3 to 5 contextual internal links per 1,000 words. Effective internal linking with this density improves crawlability and passes SEO signals between pages. Don’t add links mechanically. Each link should genuinely help the reader go deeper on a related topic.
Use descriptive, keyword-rich anchor text. Avoid generic anchors like “click here” or “read more.” Instead, use natural variations of the target page’s keyword. “WordPress caching guide” tells Google what the linked page is about. “Click here” tells it nothing.
Keep important pages within 1 to 2 clicks of your homepage. Pages buried deep in your site structure get crawled less frequently and rank lower. If a page matters for your business, it should be reachable quickly from your homepage or a top-level category page.
Tools like RankMath SEO include link suggestion features that scan your existing content and recommend internal linking opportunities. This makes the process faster, especially on larger sites. Understanding how hosting affects SEO rankings is also worth reading alongside your linking work, since crawl budget and server speed directly influence how often Google visits your pages.
How to track and verify improvements after optimization
Making changes without measuring the results is the same as not making changes at all. You need a repeatable testing process to confirm that your fixes worked and to catch regressions before they hurt your rankings.
- Run Google Lighthouse before and after every change. Lighthouse gives you a lab-based score across Performance, Accessibility, Best Practices, and SEO. It’s not a substitute for field data, but it’s fast and free.
- Monitor Core Web Vitals in Google Search Console. The Core Web Vitals report shows field data aggregated from real Chrome users. Check it weekly after making changes. Improvements take 28 days to fully reflect in the report.
- Set performance budgets and stick to them. Example budgets from WP Engine include LCP under 2.5 seconds, total page size under 1.5MB, and fewer than 60 HTTP requests. These numbers give you a concrete line to defend against regressions from new plugins, themes, or content.
- Test mobile and desktop separately. Google uses mobile-first indexing, so your mobile Core Web Vitals scores carry more weight. A site that scores 90 on desktop and 45 on mobile has a real problem.
- Use WebPageTest for waterfall analysis. The waterfall chart shows exactly which resources load in which order and where delays occur. It’s the most precise free tool for diagnosing specific bottlenecks after initial fixes.
Real user monitoring tools provide real-time performance data broken down by device type, browser, and geographic location. DebugBear and SpeedCurve both offer RUM dashboards that complement CrUX data with actionable debug detail. Performance testing as an ongoing practice prevents the common trap of optimizing once and assuming the work is done.
Pro Tip: Set a calendar reminder to run a full PageSpeed Insights audit every 30 days. New plugins, theme updates, and added content all introduce regressions. Catching them early is far easier than diagnosing a slow site six months later.
Key takeaways
WordPress site optimization delivers the best results when you diagnose with real-user data first, then apply fixes in priority order from hosting and caching through to images, JavaScript, and internal linking.
| Point | Details |
|---|---|
| Measure before you fix | Use Google PageSpeed Insights and CrUX field data to identify real bottlenecks, not lab simulations. |
| Hosting sets the speed ceiling | Upgrade your server or host before applying front-end fixes; OPcache and Redis deliver the largest gains. |
| Image and caching fixes are high-impact | Convert images to WebP, exclude hero images from lazy loading, and implement full-page caching. |
| Internal linking builds SEO authority | Add 3 to 5 contextual links per 1,000 words and fix orphan pages using Google Search Console. |
| Optimization is an ongoing process | Set performance budgets and run monthly audits to catch regressions before they affect rankings. |
Why I think most WordPress optimization advice gets the order wrong
A common pattern in WordPress performance audits is this: site owners install WP Rocket, compress a few images, and call it done. Then they wonder why their LCP is still 4.8 seconds. The problem is often at the hosting layer, and they never check it.
Hosting is the variable that largely determines your TTFB, and TTFB is the foundation everything else builds on. You can have properly optimized images, effective caching, and a CDN in place, and still score poorly if your server takes 800ms just to respond. Sites running on cheap shared hosting can be difficult to optimize beyond a certain point, regardless of how much time you spend configuring plugins. In those cases, the solution may be a host migration rather than another plugin. If you want to optimize WordPress site effectively, start by checking whether your hosting environment is limiting its performance.
Another common mistake is treating optimization as a one-time project. You fix the major issues, performance improves, and then three months later a new page builder block or a poorly coded plugin quietly adds 400ms back. WordPress optimization is an ongoing process that requires regular audits, not a checkbox you tick once. Make monthly checks with PageSpeed Insights and Search Console part of your routine, and you can catch regressions before they become bigger problems.
Internal linking is another SEO task that often gets overlooked because it can feel tedious. Don’t skip it. It’s one of the few things you can do that improves both crawlability and user experience at the same time, with no additional cost. Start with your orphan pages and fix those first. Then build a clear pillar structure. The SEO benefits of consistent internal linking can compound over time in a way that one-off technical fixes rarely do.
— Peter
Start with the right hosting foundation
Everything in this tutorial assumes your hosting can actually support the improvements you’re making. If your server response time is consistently above 600ms, no caching plugin will fully compensate. Digi Host Guide’s hosting reviews cover performance-oriented plans from providers that offer performance-enhancing technologies such as OPcache, Redis, and server-level caching. These are the features that make the biggest difference for WordPress speed. If you’re setting up WordPress from scratch or migrating to a faster host, the WordPress hosting setup guide walks you through the full process step by step. Getting the foundation right means every optimization you apply on top of it actually sticks.
FAQ
What is the fastest way to speed up a WordPress site?
The fastest improvement comes from fixing your hosting and enabling server-level caching. Full-page caching cuts page response time from hundreds of milliseconds to 10 to 30ms, which is the single largest speed gain available.
What is a good TTFB for a WordPress site?
A good TTFB is below 200ms. Anything above 600ms indicates a server-side problem, typically poor hosting, missing OPcache, or no server caching configured.
How many internal links should a WordPress page have?
Aim for 3 to 5 contextual internal links per 1,000 words. Each link should use descriptive anchor text rather than generic phrases like “click here,” which pass no topical signal to Google.
How often should I audit my WordPress site’s performance?
Run a full audit using Google PageSpeed Insights and Search Console at least once a month. New plugins, theme updates, and content additions regularly introduce performance regressions that are easier to fix early.
Does image format really affect WordPress speed that much?
Yes. WebP images are 25 to 35% smaller than JPEGs at comparable quality. Converting your image library to WebP and excluding hero images from lazy loading directly improves your LCP score.
