

Last Updated on: 30th May 2026, 12:03 pm
TL;DR:
- Proper website migration requires thorough preparation, including site audits, comprehensive backups, and detailed redirect mapping.
- Following a disciplined sequence of steps—such as testing on staging, lowering DNS TTL, and verifying redirects—ensures a smooth transition with minimal SEO impact.
- Post-migration monitoring over 90 days helps identify errors early, securing site stability and preserving search rankings effectively.
Moving a website to a new host or domain is one of those tasks that looks straightforward until something goes wrong. Knowing how to migrate a website the right way means the difference between a smooth transition your visitors never notice and a costly outage that tanks your search rankings and frustrates your users. The risks are real: broken pages, lost data, SEO drops, and hours of unplanned downtime. But none of those outcomes are inevitable. With the right preparation, a clear sequence of steps, and disciplined post-migration monitoring, you can move your site safely and confidently. This guide walks you through exactly that.
Table of Contents
- How to migrate a website: preparation first
- Step-by-step migration execution
- Post-migration verification and monitoring
- Common pitfalls and how to avoid them
- My honest take on website migration
- Plan your migration with the right hosting partner
- FAQ
How to migrate a website: preparation first
Before you touch a single file, you need a clear picture of what you’re working with. Skipping this phase is the single most common reason migrations go sideways.
Audit your current site
Start by cataloging everything your site contains: all URLs, page titles, meta descriptions, and current SEO metrics like organic traffic and backlink counts. Export this data using Google Search Console or a crawl tool. You’ll use it later to verify nothing was lost and to map redirects accurately.
Back up everything, not just the obvious files
A full backup means website files, databases, email configurations, SSL certificates, cron jobs, and hidden files like “.htaccess`. Partial backups missing hidden config files lead to broken server environments after migration. Don’t assume your hosting control panel’s one-click backup catches it all. Download a manual copy and store it somewhere off-server.
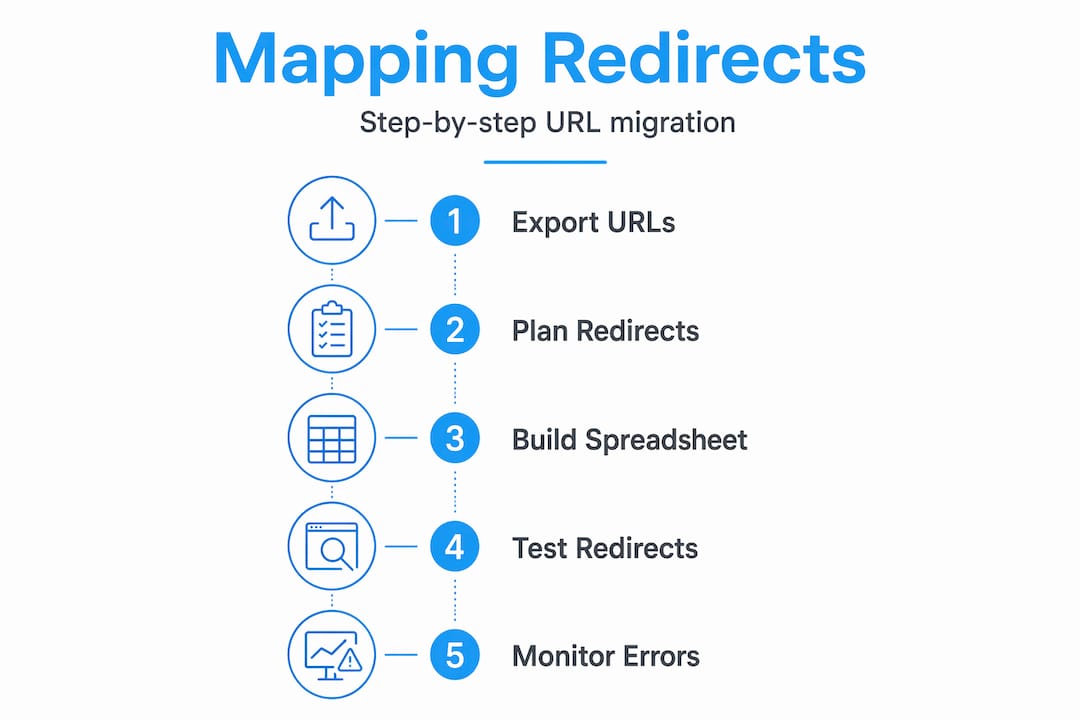
Map your URLs and plan redirects
If any URLs are changing, you need a redirect map before you migrate. A spreadsheet with exact old-to-new URL pairs is the standard approach. Redirect mapping spreadsheets with edge case testing prevent SEO ranking drops and crawl errors that are painful to fix after the fact.
Set up a staging environment
A staging environment is a private, non-indexed copy of your new site where you can test everything before going live. Testing redirects and content on staging before the DNS switch prevents bugs from surfacing during live cutover. Most quality hosts offer staging tools built into their control panels.
Lower your DNS TTL in advance
TTL stands for Time to Live. It controls how long DNS resolvers cache your domain’s IP address. If your TTL is set to 86,400 seconds (24 hours), changing your DNS records could leave visitors hitting your old server for up to a full day. Lowering TTL to 300 seconds at least 24 hours before migration dramatically reduces that propagation window.
Here’s a quick reference for preparation tasks and their timing:
| Task | When to complete |
|---|---|
| Full site audit and URL export | 1 to 2 weeks before migration |
| Complete backup of files and databases | 48 hours before migration |
| Redirect mapping spreadsheet finalized | 48 hours before migration |
| Staging environment tested and approved | 24 to 48 hours before migration |
| DNS TTL lowered to 300 seconds | At least 24 hours before migration |
| Team roles and responsibilities assigned | 1 week before migration |
Pro Tip: If you’re working with a team, assign one person to own each phase: backup, file transfer, DNS changes, and post-migration checks. Planning and team roles are what separate smooth migrations from costly mistakes.
Step-by-step migration execution
With preparation complete, you’re ready to move. Follow this sequence carefully and don’t skip steps.
Export your database from the old host. Use phpMyAdmin or your host’s database tool to export a full SQL dump. Label it with the date and time so you know exactly which version you’re working with.
Download all website files from the old host. Use FTP or your host’s file manager. Make sure you grab hidden files. A missing
.htaccessfile, for example, will break WordPress permalinks immediately.Upload files to the new host. Use FTP or SFTP to transfer everything to the correct directory on your new server. Verify file counts match between old and new.
Create a new database on the new host and import your SQL dump. Update your site’s configuration file (for WordPress, that’s
wp-config.php) with the new database name, username, and password.Test the site using a temporary URL or hosts file edit. Before changing DNS, preview your site on the new server by modifying your local
hostsfile to point your domain to the new IP. This lets you catch broken links, missing images, or plugin errors without affecting live visitors.Implement your 301 redirects. Upload your redirect rules to the new server’s
.htaccessfile or redirect manager. Always use 301 redirects, not 302, since 302s signal a temporary move and won’t pass SEO authority to the new URLs. Redirect chains longer than five hops also degrade performance, so keep your rules clean and direct.Update your DNS records to point to the new server. Log into your domain registrar and update the A record (or nameservers) to the new host’s IP address. Because you already lowered your TTL, propagation should complete within minutes to a few hours rather than a full day.
Verify the live site immediately after DNS propagates. Check your homepage, key landing pages, and any pages with high organic traffic. Confirm SSL is active and that HTTP requests redirect to HTTPS.
Pro Tip: Do your DNS switch during off-peak hours, typically late at night or early morning on a weekday. Traffic is lower, so fewer users are affected if something needs a quick fix. Understanding how hosting affects SEO can also help you choose a new host that won’t introduce performance issues post-migration.

Post-migration verification and monitoring
Going live is not the finish line. The next 90 days matter more than most people realize.
Start with an immediate checklist right after DNS propagates:
- Confirm all high-traffic URLs load correctly and return 200 status codes
- Test every redirect in your mapping spreadsheet to verify it resolves to the right destination
- Check that your XML sitemap is accessible and submitted to Google Search Console
- Verify robots.txt is not accidentally blocking search engine crawlers
- Confirm no pages carry a
noindextag that shouldn’t be there - Check that your SSL certificate is valid and covering all subdomains
Once the basics are confirmed, submit a Change of Address request in Google Search Console if you’ve moved to a new domain. Google uses this tool to transfer ranking signals from your old domain to the new one, and that signal transfer continues for 180 days.
Post-migration monitoring should follow a phased schedule. Monitoring on a daily-to-weekly schedule over 90 days helps you catch redirect errors and indexing issues before they compound into serious traffic losses.
| Time period | What to monitor |
|---|---|
| Days 1 to 7 | Crawl errors in Search Console, redirect accuracy, 404 reports |
| Weeks 2 to 4 | Organic traffic trends, Core Web Vitals, index coverage |
| Months 2 to 3 | Backlink health, ranking changes, site speed benchmarks |
After the migration stabilizes, revert your DNS TTL back to a normal value. Recommended post-migration TTL is typically 4 to 24 hours. Leaving it at 300 seconds permanently puts unnecessary load on DNS servers.
Common pitfalls and how to avoid them
Even well-planned migrations hit snags. Knowing what to watch for puts you ahead of most people attempting an easy website transfer on their own.
- Broken pages from missing files. This usually traces back to an incomplete download from the old server. Go back to your backup and re-upload any missing assets.
- SEO drops from redirect errors. Most SEO risks during migration come from redirect errors, missing pages, or misconfigured canonical tags. Run a full crawl with a tool like Screaming Frog after launch to catch these fast.
- Email stops working. If your domain’s MX records were hosted with your old provider, they won’t automatically transfer. Check your MX records separately and update them if needed. This is a step many people forget entirely.
- Unexpected traffic drops. A short dip in traffic is normal in the first two to four weeks as Google re-crawls your site. A sustained drop beyond that usually points to a redirect problem or an indexing issue worth investigating.
- DNS TTL mismanagement causing extended downtime. If you forgot to lower your TTL before migration, you may be stuck waiting for propagation. There’s no fast fix here except patience and monitoring.
If something goes seriously wrong and you need to reverse course, you can cancel a Change of Address request in Google Search Console within 180 days. The process requires removing 301 redirects and notifying Google through the tool. Keep your old domain active and paid up for at least 180 days post-migration to avoid losing ranking signals and to protect against domain fraud.
For a broader look at hosting mistakes that can compound migration problems, Digihost Guide’s guide on common hosting mistakes is worth reading before you start.
My honest take on website migration
During my career, I have experience with many migrations, and the pattern when things go wrong is almost always the same. Someone rushes through preparation, skips the staging test, and then spends twice as long cleaning up the mess after launch. The technical steps are not the hard part. The discipline to do them in order is.
The piece most people underestimate is redirect mapping. I’ve seen experienced developers transfer a site perfectly from a technical standpoint and then lose 40% of their organic traffic because they didn’t map redirects for URL structure changes. That traffic doesn’t come back overnight. Careful redirect management is genuinely the most SEO-critical part of the whole process, and it gets treated like an afterthought.
My other strong opinion: do a full rehearsal on staging before you touch DNS. Not a partial test. A complete walkthrough of every step, including importing the database, testing forms, checking load times, and verifying every redirect in your map. If something breaks on staging, you fix it quietly. If it breaks on live, your visitors and Google both notice.
Documentation matters more than most people think too. Write down every change you make, every file you move, and every DNS record you update. If you need to roll back or troubleshoot three weeks later, that log is the only thing that will save you time.
Patient, methodical work wins here. There’s no shortcut that doesn’t cost you somewhere else.
— Stefan
Plan your migration with the right hosting partner
Choosing the right host before you migrate is just as important as the migration process itself. A host with poor server response times, unreliable uptime, or weak support will create new problems the moment your site goes live on their infrastructure. That’s a frustrating outcome after all the careful work you’ve just done.
Digi Host Guide’s hosting reviews cover the providers most worth considering, with honest assessments of performance, pricing, and support quality. If you want a quick comparison across the top options, the top web hosting providers list is updated regularly and breaks down which hosts suit different site types. Picking the right environment before you migrate saves you from having to do this all over again in six months.
FAQ
What is the safest way to migrate a website?
The safest approach is to back up all files and databases, test the migration on a staging environment, lower your DNS TTL 24 hours in advance, and use 301 redirects for any URL changes. This process minimizes downtime and protects your SEO.
How long does a website migration take?
A straightforward host-to-host migration with no URL changes can take a few hours. A full domain migration with URL restructuring and redirect mapping typically takes one to two days of active work, plus up to 48 hours for DNS propagation.
Will migrating my website hurt my SEO?
A well-executed migration with proper 301 redirects causes minimal SEO impact. Google’s Change of Address tool transfers ranking signals for 180 days, and most sites recover fully within a few weeks if redirects are correctly implemented.
What is DNS TTL and why does it matter for migration?
TTL (Time to Live) controls how long DNS resolvers cache your domain’s IP address. Setting TTL to 300 seconds before migration means DNS changes propagate in minutes rather than up to 24 hours, significantly reducing potential downtime.
How do I monitor my site after migration?
Use Google Search Console to check crawl errors, index coverage, and redirect status daily for the first week. Then shift to weekly checks for organic traffic trends and Core Web Vitals through the first three months.

